






Blog
How to Install a Sump Pump
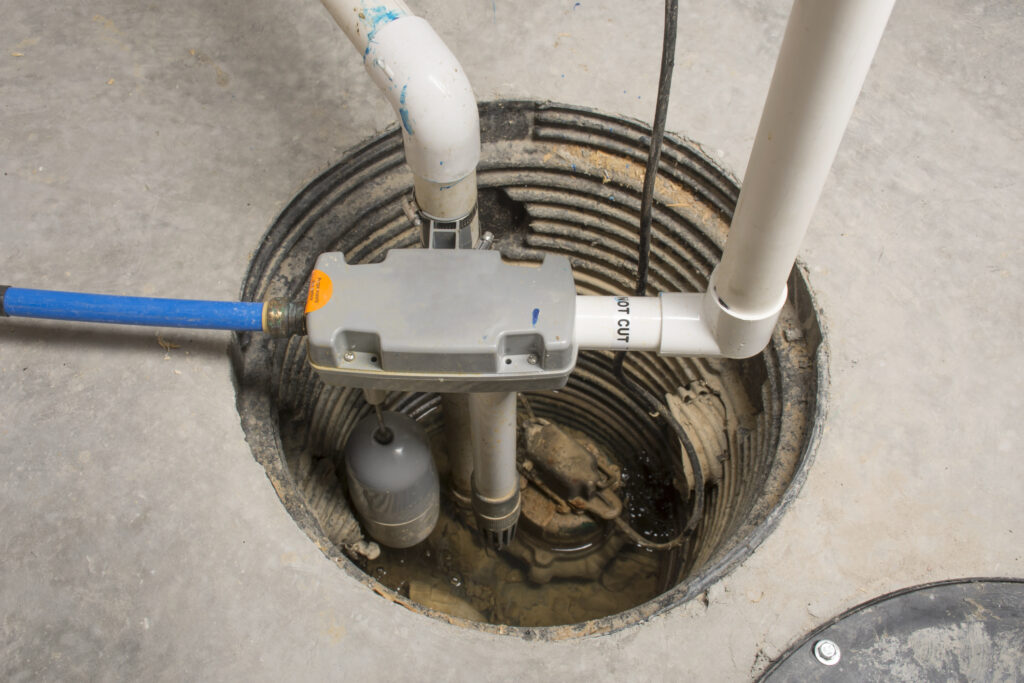
A sump pump install protects basements from flooding by moving groundwater away from the foundation before water starts collecting inside the home. In Central Illinois, heavy rain, spring storms, melting snow, and older basement construction all create conditions where moisture becomes a recurring problem.
Some homeowners handle a basement sump pump installation themselves, but the work involves drainage planning, concrete cutting, proper discharge routing, and electrical safety. This guide explains how the process works, what tools are needed, and when it makes sense to call a plumber for sump pump installation instead of tackling the project alone.
Tiger Plumbing has served Central Illinois since 1993 with licensed plumbers, HVAC technicians, and electricians who handle long-term home protection.
What A Sump Pump Does
A sump pump collects groundwater in a pit, then pushes the water away from the home before it floods the basement.
These systems are common in:
- Basements
- Crawl spaces
- Homes with recurring water intrusion
- Properties with poor drainage near the foundation
Without proper drainage, water buildup places pressure against the foundation and increases the risk of flooding and structural damage.
Can I Install a Sump Pump Myself?
Some homeowners complete a sump pump install on their own, especially when replacing an older unit in an existing basin.
Common tools and materials include:
- Sump pump
- Basin
- Gravel
- PVC pipe
- Check valve
- Drill
- Saw
- Sealant
- GFCI outlet
Before starting, check local drainage and discharge rules. Some municipalities restrict where water can drain after it leaves the system.
Step 1: Choose the Right Location
The sump pit should sit at the lowest point where water naturally collects.
Installations work best:
- Near a basement wall
- Close to a power source
- Along a practical discharge route
The discharge line also needs a clear path that moves water away from the house instead of back toward the foundation.
In older homes around Springfield’s Historic West Side and parts of Bloomington, basement drainage layouts sometimes create moisture buildup along foundation walls before flooding becomes visible.
Step 2: Dig the Sump Pit
Mark the area carefully before cutting into the basement floor.
After the concrete is removed, dig deep enough to fit the basin while leaving room for gravel underneath. The pit also needs enough space for the float to move freely during operation.
This is the most labor-intensive part of a basement sump pump installation.
Step 3: Set the Basin and Base
A stable base helps the pump stay level and operate correctly.
Most installations use gravel underneath the basin to improve drainage and create solid support. Once the basin is lowered into place, check that it sits level before moving forward.
A tilted basin interferes with float movement and causes cycling problems later.
Step 4: Install the Pump
Lower the pump carefully into the basin and position it so the float moves freely without hitting the sides.
Submersible pumps sit inside the basin, while pedestal pumps keep the motor above the pit.
At this stage, the focus stays on:
- Stable placement
- Proper float movement
- Secure positioning inside the basin
A properly installed sump pump should activate without obstruction and cycle normally.
Step 5: Add the Discharge Line
The discharge line carries water away from the home after the pump activates.
Attach the PVC pipe securely and route it so water flows away from the foundation. The line should slope properly and discharge into an approved drainage location.
Poor discharge routing sends water back toward the house and creates recurring moisture problems around the basement.
Step 6: Install the Check Valve
The check valve prevents discharged water from flowing back into the pit after the pump shuts off.
Without a check valve:
- Water falls back into the basin
- The pump cycles more frequently
- Extra wear develops on the motor
The valve installs along the discharge pipe above the pump connection.
Step 7: Test the System
Fill the basin with water to test the system before closing the project.
Watch for:
- Proper float activation
- Normal pump cycling
- Strong discharge flow
- Leaks around fittings
- Unusual sounds during operation
This is also a good time for testing your sump pump before storm season arrives in Central Illinois.
When To Call a Professional Plumber for Sump Pump Installation
Some sump pump installation projects move beyond standard DIY work quickly.
It is time to call a plumber if the project involves:
- Concrete cutting
- Electrical work
- Drainage corrections
- Discharge routing problems
- Basement flooding history
- Local code questions
In Peoria neighborhoods near War Memorial Drive and Knoxville Avenue, older drainage systems and shifting soil conditions can create recurring basement moisture problems that basic repairs do not fully address.
A professional plumber in Peoria can inspect drainage conditions, install the system correctly, and help prevent future basement water damage. Homeowners looking for a sump pump plumber in Bloomington can also contact Tiger for inspections, replacements, and long-term drainage solutions.
Contact us today to schedule service with Tiger Plumbing. You can also review our service areas or ask about the Membership program for ongoing plumbing maintenance and basement protection.
Contact UsFrequently Asked Questions
Some homeowners handle a sump pump install on their own, but the project becomes more difficult when concrete cutting or electrical work is involved.
A standard installation often takes several hours, depending on drainage conditions and concrete work.
The discharge line should carry water away from the foundation to an approved drainage area.
Testing your sump pump involves filling the pit with water and confirming the float activates and the discharge line moves water properly.